5 Kip Drills You Can Do At Home

The kip is a milestone skill in gymnastics. For many gymnasts, the kip is the first skill that provides a true challenge. The kip is a mount to get on the bar beginning as early as level 3 on Competitive Team. It is a skill that requires both strength and proper timing. It requires many repetitions and a lot of trial and error. Here are a few easy drills that you can practice at home to work on both the strength and proper technique.
Frisbee Glide Extensions
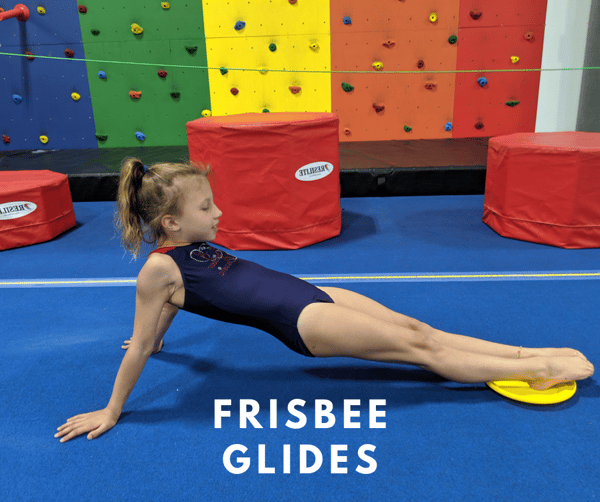
- This drill mimics the glide swing, the first part of the kip.
- Start in a pike sit with the frisbee (or paper plate) on your heels.
- Lift your hips and extend your feet out and then pull back.
- The goal is to reach full extension, from shoulders to hips.
Leg Lifts
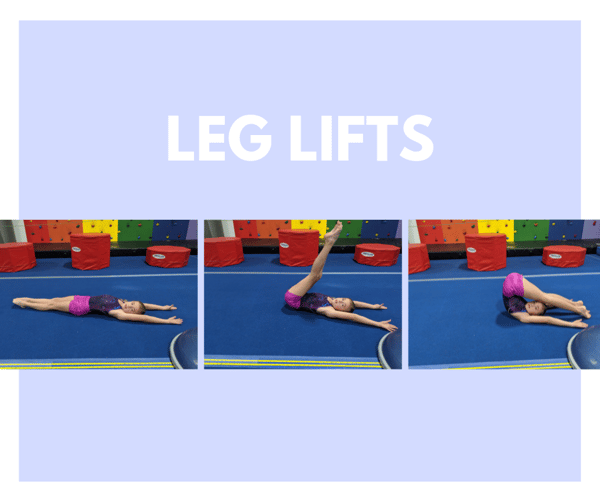
- In this second drill, the gymnast starts by lying flat on their back.
- The gymnasts then lifts both legs up and over their head to touch the floor.
- Remember to keep the legs straight and together to practice good form and technique.
Shoot to Candle
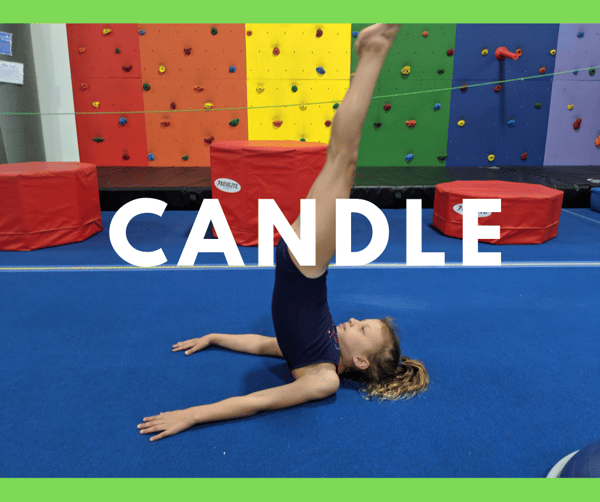
- Start on your back with your legs in a pike position and hands at your toes.
- Lift your toes up to a candle position, finishing with hands at your hips.
- For an added challenge and to better replicate the kip, after reaching the candle, shoot the toes down to a pike and push with straight arms to a pike compression sit.
Straight Arm Forward Pike Roll
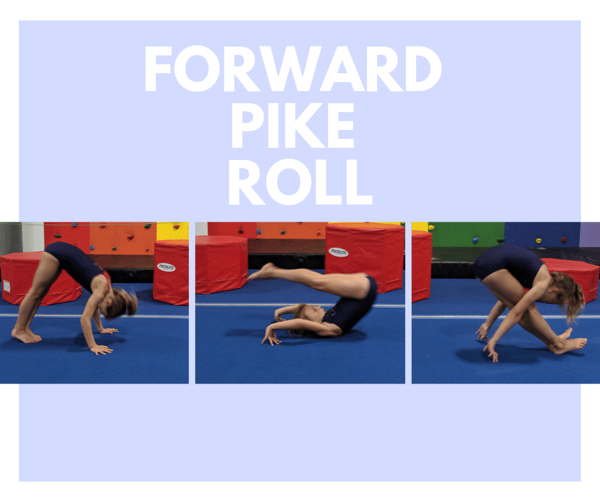
- Perform a forward pike roll and stand up with straight arms.
- Push with straight arms to stand up.
- Keep the arms straight to mimic the finish position of the kip.
Wrist Shifts
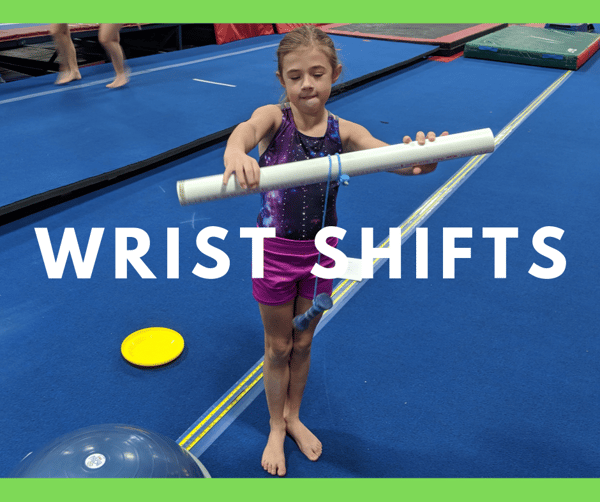
- Using a broom or PVC pipe tie a small weight to a string or rope and around the broom or pipe.
- Hold the broom with both hands and shift your wrists to twist the rope around the broom.
- Be sure to keep your arms straight and shift your hands forward.
Practicing these drills in combination with the kip will help your gymnast master the skill!
Happy Kipping!
Read more:

